How to factory reset Windows 10 or Windows 11, Factory resetting Windows 10 or Windows 11 can be a great way to fix a sluggish or unresponsive computer. It clears our a lot of changes you might have made, applications that might be causing trouble, and old drivers that might not have been uninstalled properly. A fresh start can make your PC feel even better than general Windows speed up tricks.
Here’s how to factory reset Windows 10 and Windows 11 to get your PC feeling right again.
First, back up your computer
Before you reset your system, you’ll want to back up important information that you don’t want to lose. This includes documents, photos, music, and movies, but there are other items to back up as well. Make sure that you know all of your saved passwords, export all of your browser bookmarks, and have installation files for all the software you’ll want to reinstall — or know where to get them.
Also, make sure you back up app-specific data, like custom filters saved in a photo utility, save files from your favorite games, and back up emails if using an offline client.
How to factory reset Windows 10 or Windows 11
How to factory reset Windows 10
Windows 10’s reset feature is found in the settings panel. It can rebuild a fresh copy of Windows 10 if you so choose, replacing all drivers and resetting all settings.
Note that this might be technically different from a “factory reset” option provided by manufacturers. Check your documentation or give technical support a call if you want to return your PC to how it was when you first pulled it out of the box. The manufacturer might have special partitions set up on the hard drive or might be able to provide a factory restore image on bootable media.
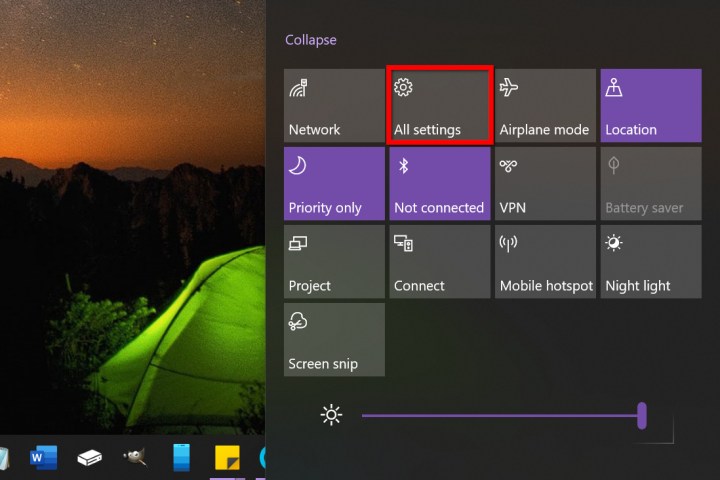
Step 1: Click the* Notifications* icon on the taskbar (or press the Windows button + A) and then select the All settings tile in the Action Center. You can also select the start button followed by the Gear icon on the Start Menu.
Step 2: Select Update & Security.
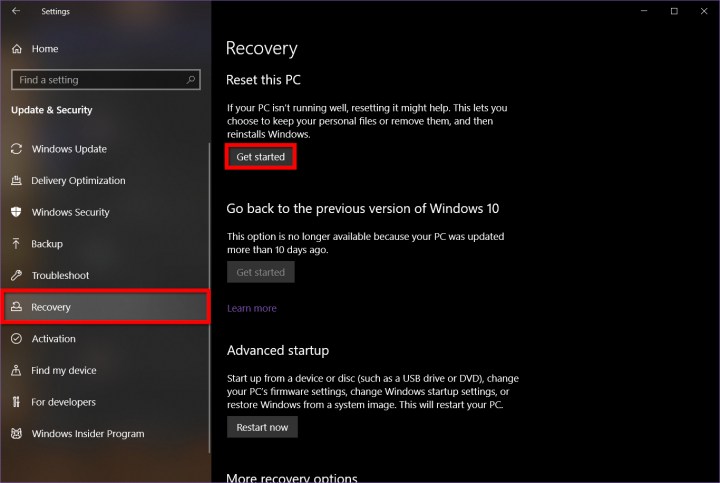
Step 3: Select Recovery listed on the left.
Step 4: On the right, you’ll see two options. The first, Reset this PC, is the method we’re going to use for this guide. When you are ready, click the Get Started button listed under Reset This PC.
The second, Advanced startup, is worth considering if you have a little more technical skill. It’s for modifying your computer on a deeper level or installing a completely different operating system. This comes in handy if your manufacturer provides a factory restore image or external drive containing the image to return your machine to its factory state — proprietary software included.
Unless you’re completely sure you understand what each of the options in this setting does, it’s probably best to leave it alone.
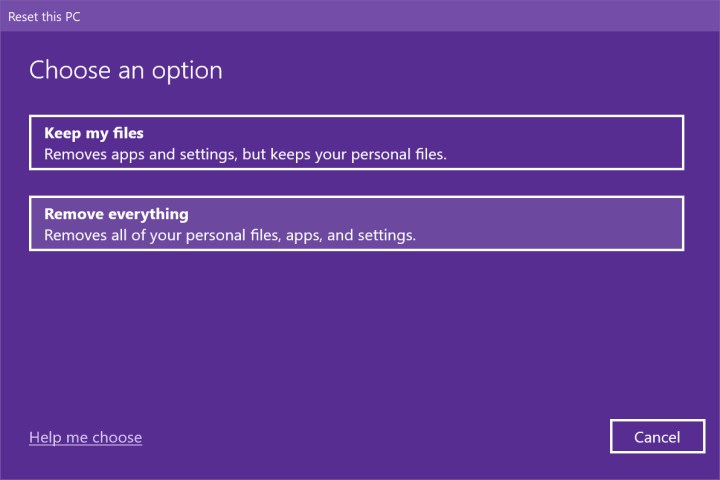
Step 5: A new window will appear with two options, Keep my files and Remove everything.
Here you need to decide whether you want to keep all of your files and folders intact, or truly start from scratch and then use your backup to restore those files and folders. Whichever you choose, you will need to reinstall all apps and programs acquired outside the Microsoft Store. Your settings, such as the Start Menu arrangement, will go back to their defaults.
Select one of the two options.
In both cases, it rebuilds Windows 10 using the current installation. It’s Microsoft’s “imageless recovery” system so installation media doesn’t need to lurk on a hidden partition, taking up space. However, the Local reinstall option may not be able to repair Windows 10 if it’s too broken, too corrupted. That’s where the Cloud download option comes in: Windows pulls everything from Microsoft’s servers to rebuild the local copy.
Both options return all settings to their factory defaults and remove all software not installed from the Microsoft Store. However, the Keep my files option keeps your profile intact along with the associated files and folders. What it doesn’t do is update Windows 10 to the latest version if you never bothered to install patches and feature updates. The Cloud download option installs the latest version stored in Microsoft’s cloud.
Step 6: Select a source: Cloud download or Local reinstall.
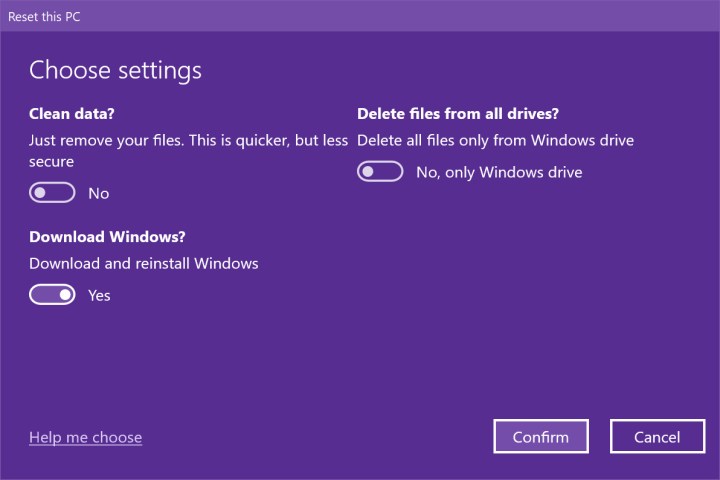
Step 7: On the following screen, select the Choose settings link if you would like to alter the current reset settings. Otherwise, skip to Step 9.
The image is based on the Remove everything option and using the cloud as our source. Since our example PC has multiple drives, we have an additional “Delete files from all drives” setting. Note that you can toggle off reinstallation, but if you’re having serious issues related to Windows 10 components, a fresh copy might be ideal.
Likewise, if we took the Keep my files route and selected the Local reinstall option, we would see two toggles: Restore preinstalled apps and settings that came with the PC, and rebuild Windows 10 using the local installation.
Step 8: Select the appropriate toggle next to the setting you want to alter and then select Confirm.
Step 9: Select Next to proceed.
Step 10: The Reset tool will present a summary. If you chose the Keep my files option, you’ll see a link you can click to see all the apps that will be removed during the reset, like Google Chrome, Steam, and even Microsoft 365. This list will be saved to your desktop when you finish the recovery process. You won’t see this link when you select the Remove everything option.
Make sure you are good with everything, and then select the *Reset *button.
Your PC will reboot automatically and enter the Windows Recovery Environment. The reset process might take an hour or more, so if you’re using a laptop, it’s a good idea to plug in the power cord. It may reboot itself several times. Wait for Windows to restart and begin the setup process, then enter your personal information and login information if prompted.
Once you’ve confirmed everything’s working, make sure Windows 10 is up to date and install the latest drivers from hardware manufacturers.
How to factory reset Windows 11
The factory reset process for Windows 11 is much the same as it is for Windows 10.
Step 1: Press the Windows + I keys together to open up important pinned apps. Here, look for the Settings menu with the gears icon, and select it.
Step 2: Select Update & Security. Look at the left-side menu and choose Recovery.
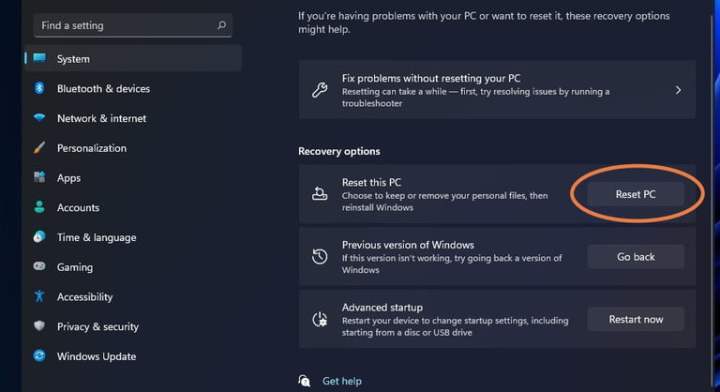
Step 3: Select the Reset PC option on the right.
Step 4: At this point, things should look like they do in Windows 10. You will need to choose to “Keep My Files” or “Remove Everything.” Then you will be able to choose between a “Cloud Download” and a “Local Reinstall”.
Step 5: Here things get a little different. Instead of another Settings menu, Windows 11 streamlines the process for clarification and shows you the current settings you have chosen in a summary window. If everything looks all right, select Next. Do one final check, then select* Reset*.
Another way to factory reset Windows
Another method is to use the manufacturer’s recovery tool, usually located on a separate partition on your hard drive. You’ll find a wide variety of recovery software with name brands numerous enough to match the various brands of electronic devices in which you’ll install them. We have tried to make it less overwhelming by narrowing the list down to our preferred software. Each brand has a different name for what you are looking for, so here is a list of what to search for according to each brand:
You can also access these recovery options outside of Windows, which means you still have hope if your OS won’t load. Every manufacturer is different, but you can find the method for accessing recovery just after powering on your machine. Read the text as your machine boots and look for the recovery mode key. Many devices use the F11 key as a shortcut to recovery mode.
The most common Windows 11 problems and how to fix them
With Windows 10 officially losing support next year, Windows 11 is poised to take over as the dominant operating system. Many users have already switched over to the latest Microsoft OS – and while it’s not perfect, most are finding it to be a nice step forward from Windows 10. Of course, there are a few quirks people will have to get used to, but most of the bugs and technical issues have already been ironed out.
That’s not to say Windows 11 is perfect. In fact, there are still a handful of common Windows 11 problems that people are encountering, including ones that cause no sound to play, network connections to be laggy, and games to run at less-than-optimal speeds. Thankfully, many of these issues are easy to resolve without extensive troubleshooting or the need to contact customer support.
If you’re experiencing any growing pains, here’s a look at the most common Windows 11 problems and how to fix them. Once you’ve solved your issue, be sure to look at our favorite Windows 11 tips and tricks to make the most out of the operating system.
No sound in Windows 11
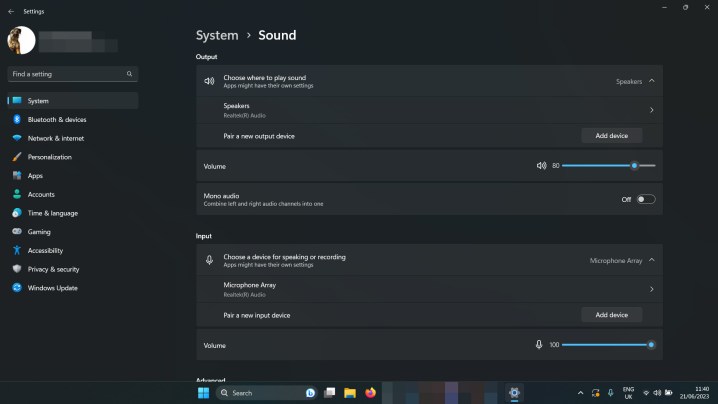
Windows 11 does have sound. It should have sound. But if your version of Windows 11 stubbornly refuses to make any sound, you might need to fix it. There are a few reasons that you might have no sound on Windows 11, so try a few of these potential fixes:
Windows 11 network issues
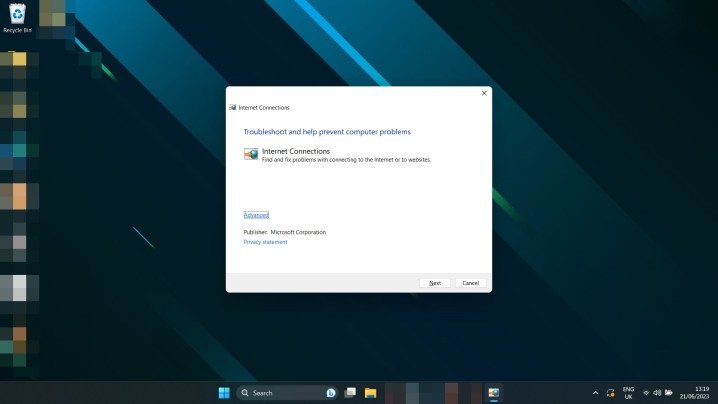 Image used with permission by copyright holder
Can’t connect to the internet? Connection slower than expected? Windows 11 network problems can crop up from time to time. Try these possible fixes:
Your Windows 11 screen is flickering, blurry, or black
Is your screen not behaving properly in Windows 11? If it doesn’t look right, here are some fixes you can try:
Games running slow on Windows 11
Gaming performance on Windows 11 has been a mixed bag since its debut, and some people have faced serious performance issues.
If your game performance is still poor, you might need to adjust your in-game settings for better performance. Check out our guide to in-game settings so you can maximize your frames per second.
Windows 11 search can’t find your files
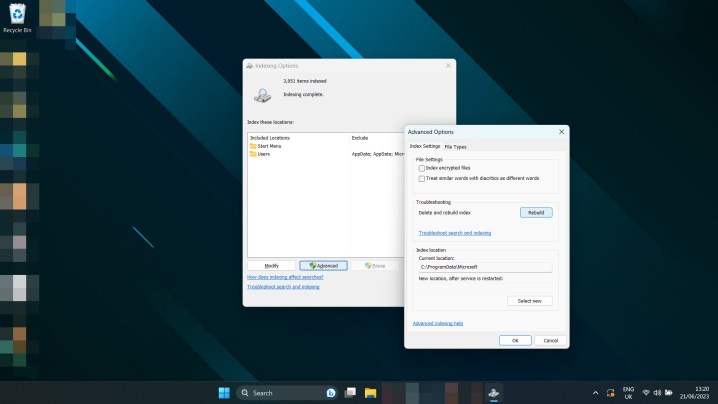 Image used with permission by copyright holder
Windows 11’s search tool is smart, but sometimes it acts really dumb. It might just need to index your files again, though. Try this:
Use Windows search to look for Index and select Indexing options. Select Advanced > Rebuild.
Now that you’re a wiz at Windows 11 troubleshooting, why not brush up on printer setups? Here’s how to set your printer up properly in Windows 11.
Views: 619




Leave a Comment